A major competition is this weekend, so we switched back to a lighter pace and focus on techniques. Tonight’s focus was on escapes from bad positions. I was thrilled, as I wind up stuck in them so often!
We started with concepts, which I also liked. I do a lot better when I grasp the concepts with a few examples to illustrate them rather than being handed techniques with no idea of the context.
The attacker generally wants to take space from the defender to limit his options. Then he or she 1) secures the position, 2) hunts for a submission, 3) transitions to a better submission if no immediate submission is available
Defender want to make space/options by creating a frame, defending from submissions, and transitioning to a better position. Then we moved on to the practical examples.
Bottom Side Control Escapes
1st Escape – Starting position both arms inside, flat on back, top man in side control with one hand under the head and the other over the body. Keep the frame by pressing both hands into prayer position, forearms tight together, elbows on rib cage, hands near neck and jaw to defend vs. chokes. Chin tucked, and hands often on side of neck nearest the opponent, as you’re trying to turn into him and keep him from crossfacing/smashing. Prevent the mount transition with the leg nearest the opponent – raise the knee and block attempts to to slide into mount.
Work the feet away from the opponent to assist in leverage and create space to slip the knee nearest the opponent into the gap between his leg and torso. Bridge up and to the side, facing the opponent. Keep the arm frames in place as the body drops and knee scoots between his leg and torso. Underhook the arm closest to your head to control his posture. You’ll probably have to circle toward the top man and work that knee in as the top man attempts to hold the position. Use the foot that’s still free to keep wedging in. When the knee is finally far enough in, place that foot on the ground between the top man’s legs and then wrap the free leg around his body. Hip escape to the side to free the leg that’s still wedged under the top man, then assume closed guard. The underhooked arm closest to the head is in position for an armbar, so that can immediately be attempted.
Jeff Mancuso shows a very similar escape here. I like his detail about holding the bridge rather than trying to buck explosively. I’ve had way more luck with his method than the explosive bucking that served me pretty well in high school wrestling. Roy Dean’s video is exactly the same escape we practiced, including the underhooked near arm. Later, during positional rolling, I kept getting hit with the sweep Dean shows at the 2 minute mark when I was in top side control, too – there’s lots of goodies on that 8 minute clip!
2nd Escape from side control – One arm inside under the neck/jaw, arm nearest opponent outside. Bridge and get both hands on the cross-facing arm. Hold the bicep/shoulder area like a hamburger. Wiggle the hand that’s outside of the cross-facing arm under the armpit to make the frame. Frame up, then drive the elbow of the near-side arm to the sky – you’re tossing that cross-facing arm over your head and slipping out the side. The far side arm grabs the top man’s near side gi sleeve by the elbow, then the near side hand near the tricep. Drive the arm away and to the mat and scoot backwards out from under the top man. Its quite similar to this escape from Marcelo Garcia. The same basic “grab gi sleeve, post, and drive across his body” works on many guard pass attempts, too, esp. the torreando. Example here and here .
Mount Escapes
1st Mount Escape – trap same side arm and leg, bridge and roll. This one works when someone’s grapevining and has their head low, often with one arm around your head and the other posted out like an outrigger. Ditch the grapevines by thrusting out the legs and slamming the knees to the mat. Bring both heels up to the butt to establish both better position for the bridge and also keep top man from grapevining again. Trap the arm and leg on the same side. Don’t use opposite arm to help push – keep elbow tight to ribs and just bridge. The forearm will help drive the top man over without any need to expose that arm to a submission attempt. Here’s Draculino showing it, although he uses the other arm to help push.
2nd Mount Escape – Almost exactly like that demonstrated by Emily Kwok and Stephan Kesting here. We were told to frame with the hand on the opposite hip and keep the other hand up near the collar – the elbow stays tight to the body and drives against the thigh during the escape. I have problems hooking the top man’s leg…not sure why as yet.
Back Mount Escapes –
Just 1 – Tuck chin, get fingers on hand on the side of the choking arm inside the forearm and the thumb of the opposite hand in. Pull arm away from the neck as much as possible. Roll to the side opposite the choking arm. Move butt over the choking man’s leg on that side as you start to crab walk out. Keep pressure on the leg and position the opposite leg near the trapped shin so opponent has a harder time repositioning. When you’ve moved past the leg far enough, take the hand on the side of the choking arm, place it on the same side leg of the choker. Roll to face the choker and drive forward, keeping the hand straight out and gripping the far leg. End in side control. Example.
Left without rolling. I was feeling good and wanted to leave on a high note!
I might start moving techniques to unique entries or at least general categories so I can link directly to notes I’ve made on the technique before without having to hunt through an entire class period of notes. We’ll see how that works!


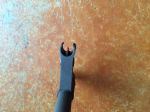
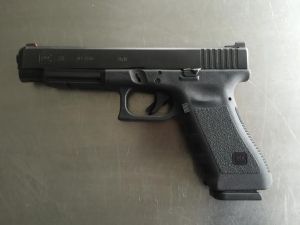
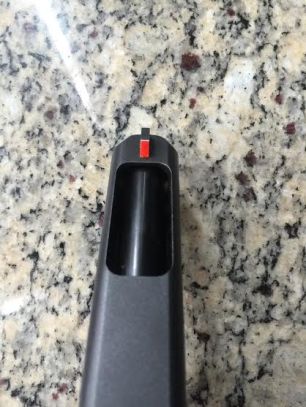 $40 for these sights…versus up to $160 for some versions of today’s popular night sights. That’s a lot of ammo.